|
Winter Wedding Invitation
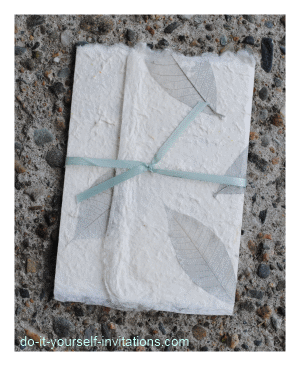
This winter wedding invitation is pretty simple to make, for the most part. The main ingredient is a beautiful handmade paper I picked up from the Handmade Paper Superstore. You can duplicate the same or similar results by purchasing the same paper or something similar that was a wintery theme or colors. The paper is purchased in very large sheets which you can pay extra to have them cut to size for you, or you can cut by hand, like I did.
Materials and Supplies:
handmade paper
cardstock
glue runner adhesive
bone folder
ribbon
rubber stamp and ink (optional)
How I Made This Winter Wedding Invitation
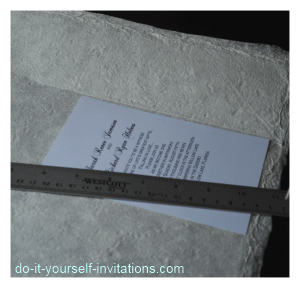 The first thing I did was set up the text to print for the inside of the invitation. I wanted to print the text onto a heavy white cardstock to add a little bit of bulk for the handmade paper to wrap around. The first thing I did was set up the text to print for the inside of the invitation. I wanted to print the text onto a heavy white cardstock to add a little bit of bulk for the handmade paper to wrap around.
The cardstock I used was a regular 65 lb. white cardstock standard size 8 1/2" by 11". What I did was set up the text so that it would print the invitation wording twice per sheet so I could cut the paper down to 5 x 7 invitations. Luckily, I offer a free invitation template to make this step a snap. It even has cutting guideline for cutting the paper to 5 x 7. Simply download the template and save it to your computer. You will need Adobe Reader to be able to use this template. Open the PDF file and place your cursor anywhere on the page. Now start typing. After your wording is all typed up, you can go back and change the size, alignment, fonts, etc... Even the color of the font can be changed. To shift the text up or down simply place the cursor either above or below the text and hit the return key.
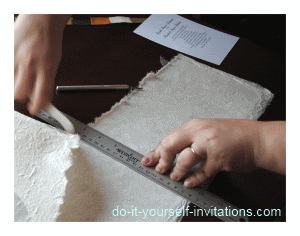 After printing the text onto a paper of your choice you will need to either bring the paper to a local copy or print shop to have it cut, or cut the paper by hand. I actually sort of scored and ripped the paper to give it a rough rustic edge. After printing the text onto a paper of your choice you will need to either bring the paper to a local copy or print shop to have it cut, or cut the paper by hand. I actually sort of scored and ripped the paper to give it a rough rustic edge.
First I calculated the size that I needed to paper to be in order to create a gatefold pocket for the winter wedding invitation. It was pretty easy knowing that the width of the cardstock would be 5". I knew I wanted the front flaps to fold over about 3/4 of the way across the front of the invitation, so I calculated 5" + 4" + 4" to cut a piece that is roughly about 8" by 13".
I started by scoring the paper with the ruler and bone folder. Then I would hold my ruler in place right at the scoring line and use it as an edge to rip the paper against. With the ruler in place ( along with the scoring) I was able to get a sort of clean but rough edge, consistent to a natural edge on handmade paper.
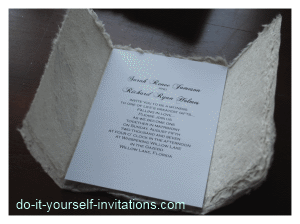 After the paper was "cut" to the appropriate size I went back and scored the paper to fold into a gatefold around the printed white cardstock. This was actually pretty easy to do using a centering ruler, along with my metal craft ruler, and the bone folder. I placed the centering ruler down just above the paper to center the cardstock in place. I then lined the metal ruler up at the edges and scored a vertical line on either side of the cardstock. I folded the paper on each scoring line to fold the outer edges inward onto each other, and viola! A handmade paper gatefold pocket! After the paper was "cut" to the appropriate size I went back and scored the paper to fold into a gatefold around the printed white cardstock. This was actually pretty easy to do using a centering ruler, along with my metal craft ruler, and the bone folder. I placed the centering ruler down just above the paper to center the cardstock in place. I then lined the metal ruler up at the edges and scored a vertical line on either side of the cardstock. I folded the paper on each scoring line to fold the outer edges inward onto each other, and viola! A handmade paper gatefold pocket!
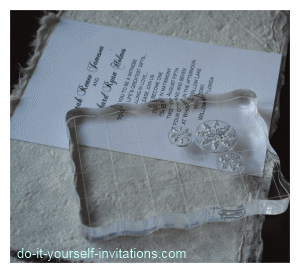 The next step is optional, although I think it really adds some visual interest to this winter wedding invitation. I added some silver snowflakes using a snowflake rubber stamp I had on hand. The stamps I used were clear stamps, so I had to first arrange them onto a acrylic clear stamping block in a pattern that would be pleasing to the eye. I also wanted to keep it a bit rustic as well. I used some metallic silver stamping ink to stamp the snow flakes onto the cardstock. The silver really tied in with the theme as the skeleton leaves that are pressed into the handmade paper are also silver. And don't forget, using a rubber stamp can be great as you can incorporate the images into all of your wedding stationery. You can stamp your envelopes, create envelope liners, and add it to any favors, or other paper stationery pieces you create. The next step is optional, although I think it really adds some visual interest to this winter wedding invitation. I added some silver snowflakes using a snowflake rubber stamp I had on hand. The stamps I used were clear stamps, so I had to first arrange them onto a acrylic clear stamping block in a pattern that would be pleasing to the eye. I also wanted to keep it a bit rustic as well. I used some metallic silver stamping ink to stamp the snow flakes onto the cardstock. The silver really tied in with the theme as the skeleton leaves that are pressed into the handmade paper are also silver. And don't forget, using a rubber stamp can be great as you can incorporate the images into all of your wedding stationery. You can stamp your envelopes, create envelope liners, and add it to any favors, or other paper stationery pieces you create.
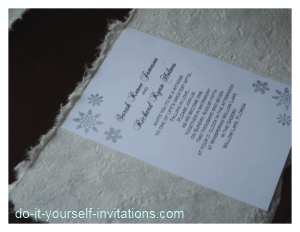 After stamping the snowflakes I used a glue runner to apply some adhesive to the back of the cardstock and attached it in place on the inside of the gatefold paper. I tied a coordinating colored ribbon around the outside of the invitation and tied it into a knot. To finish I simply snipped the ends of the ribbon to give it a neat finish. The end result was a beautiful and rustic, rich looking handmade winter wedding invitation that is also affordable.
|

 The first thing I did was set up the text to print for the inside of the invitation. I wanted to print the text onto a heavy white cardstock to add a little bit of bulk for the handmade paper to wrap around.
 After printing the text onto a paper of your choice you will need to either bring the paper to a local copy or print shop to have it cut, or
  After the paper was "cut" to the appropriate size I went back and scored the paper to fold into a gatefold around the printed white cardstock. This was actually pretty easy to do using a centering ruler, along with my metal craft ruler, and the bone folder. I placed the centering ruler down just above the paper to center the cardstock in place. I then lined the metal ruler up at the edges and scored a vertical line on either side of the cardstock. I folded the paper on each scoring line to fold the outer edges inward onto each other, and viola! A handmade paper gatefold pocket!
 The next step is optional, although I think it really adds some visual interest to this winter wedding invitation. I added some silver snowflakes using a snowflake rubber stamp I had on hand. The stamps I used were clear stamps, so I had to first arrange them onto a acrylic clear stamping block in a pattern that would be pleasing to the eye. I also wanted to keep it a bit rustic as well. I used some metallic silver stamping ink to stamp the snow flakes onto the cardstock. The silver really tied in with the theme as the skeleton leaves that are pressed into the handmade paper are also silver. And don't forget, using a rubber stamp can be great as you can incorporate the images into all of your wedding stationery. You can stamp your envelopes, create envelope liners, and add it to any favors, or other paper stationery pieces you create.
 After stamping the snowflakes I used a glue runner to apply some adhesive to the back of the cardstock and attached it in place on the inside of the gatefold paper. I tied a coordinating colored ribbon around the outside of the invitation and tied it into a knot. To finish I simply snipped the ends of the ribbon to give it a neat finish. The end result was a beautiful and rustic, rich looking handmade winter wedding invitation that is also affordable.


