|
|
|||||
|
Make Your Own Irish Wedding InvitationsCreative and DIY Irish Wedding Invitations Ideas
Having and Irish or Celtc wedding theme? Recently a reader of Do It Yourself Invitations wrote in and asked me if I could come up with some ideas for some creative homemade invitations for their Irish wedding. Eeek! Where to start? At first I drew a blank. But hey! I am from Massachusetts/Boston. And I have spent a fairly good amount of time in South Boston visiting Irish neighborhoods, restaurants, and even bars! Oh yeah, and I almost forgot. I am and almost endless fountain of ideas! Lol! The very first thing that came to my mind was an Irish Claddagh ring. When I was in grade school all the girls had them! Even those of us who weren't Irish! The ring was to symbolize being "taken" or not. Claddagh rings are even used traditionally as a wedding ring! Perfect!
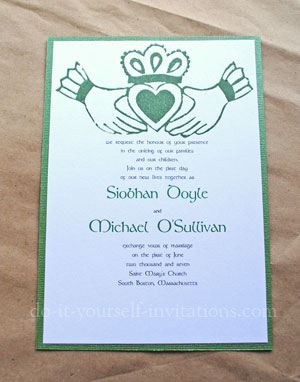
DIY Hand Stamped Irish Wedding InvitationsThe wedding that these invitations were to be created for was going to be somewhat traditional, the ceremony held in a catholic church. But the reception will be held at a traditional Irish bar!So the bride and groom asked me to create something a little more earthy and simple. Nothing too "Fancy dancy" in their words exactly. So I ran with the claddagh theme and created a hand carved custom rubber stamp! I want to show you how you can create your very own rubber stamp! It's relatively easy to do, and is a very cost effective way of creating a completely one of a kind invitation!
Materials and supplies list:
Create Your Own Rubber Stamp - i.e. Lino Block Printing!The first thing you you'll want to do is get your hands on some block printing supplies - lino block and cutter. Maybe some ink and a brayer. Lino blocks are cheap! The cutting tools aren't too expensive either, so this project is very cost effective. If you cannot find the tools and supplies at an local art supply or craft store, check around online. Next you must figure out exactly what image you would like to stamp onto your invitations. It's not hard to transfer pretty much any image onto your lino block. You can choose an image you have on hand, or some clip art, or even hand draw your graphics. What did I do? I simply Googled the word "Claddagh" into an image search and searched until I found an image I liked. I then printed the image out onto some plain white paper. You may want to re-size the image using the zoom feature on your printer, or use a copy mahcine. Next you will transfer the image to the lino block. If you hand draw the image all you need to do is use a regular lead pencil to draw your image. You can even choose to draw the picture straight onto the block! But if you are using a printed image such as I did, you will need to trace the image with a pencil. It is also acceptable to trace an image using tracing paper.
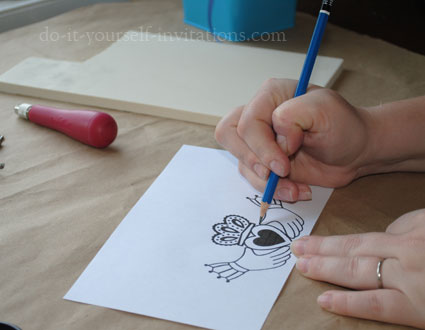 Lay the lino block down on your work surphace and then lay the paper (pencil side down) onto the block.
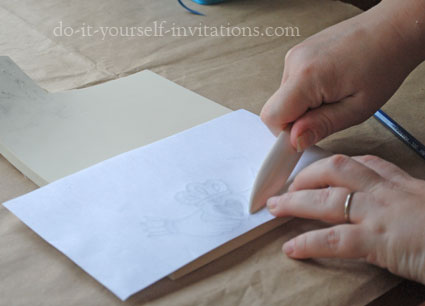 Use a bone folder, or something flat like a ruler (even the back of a large spoon?) to firmly rub the back of the paper transferring the pencil to the block. Do make sure you hold the paper in place as to keep the image from blurring.
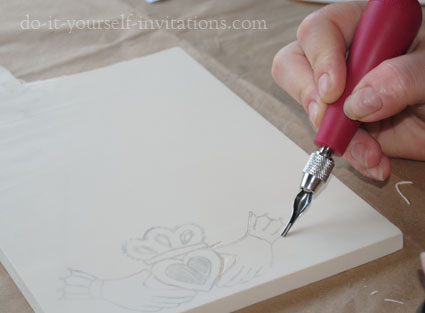
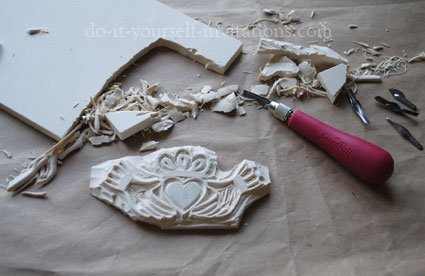
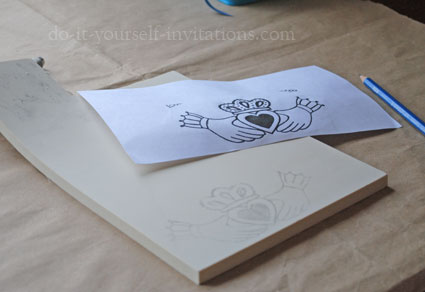 Now you're ready to get carving! This can be tricky for first timers, so I would reccomend getting the feel of the tools using parts of the blaock that have no design. Once you get the hang of it simply carve away leaving only the parts that you want to show up on your imprints. Test your work by trying a test impression using some rubber stamp ink. If there are parts you need to touch up then you can go back and finish it up.
Make Your Own Irish Wedding InvitationsI printed the wording for the invitations using one of the templates available on this site. Before printing the text I went on the hunt for some Irish inspired fonts to adorn the invites. I found a nifty and free font at Dafont.com called Stonehenge.
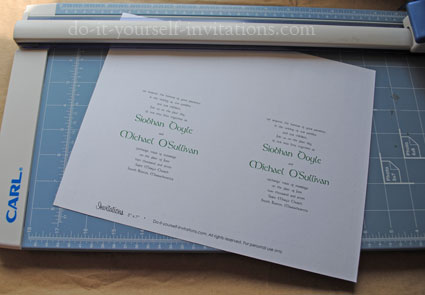 I changed the coloring on the name fonts to a deep green to match the color of the ink I chose to stamp my image with. I also just sort of eyeballed it with spacing to make sure I had enough space at the top of the invite. I then printed just one test copy. I recommend using a test copy for the first print just in case you find some corrections. So better safe than sorry! I then took the printed copy to my work station and stamped the image onto the invitations. I used simple rubber stamping ink. Block printing ink will come out much darker and more crisp looking. But it will also need to be applied to the block with a brayer and is much harder to clean up!
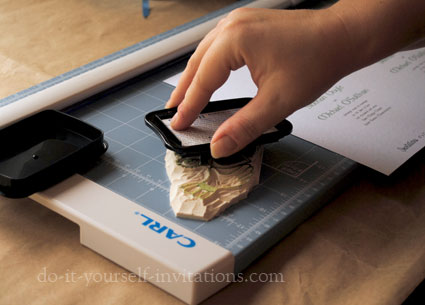 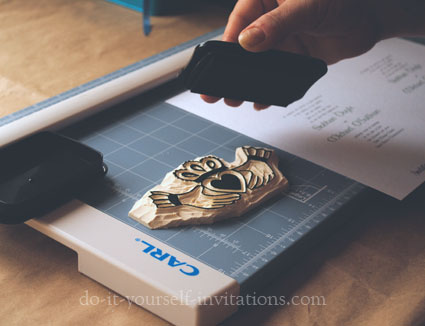 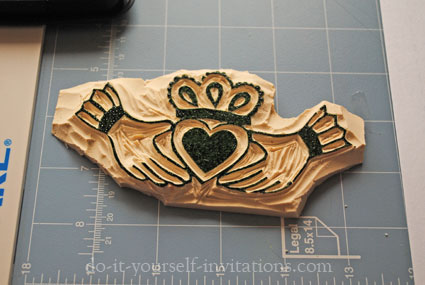 Tada! My Irish wedding invitations were coming to fruition!
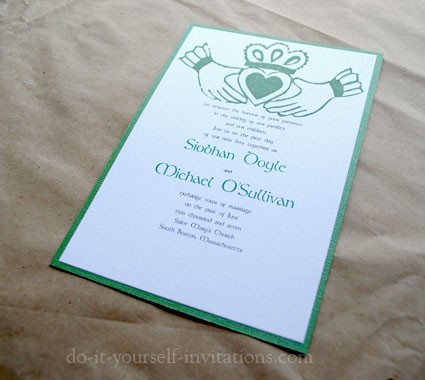
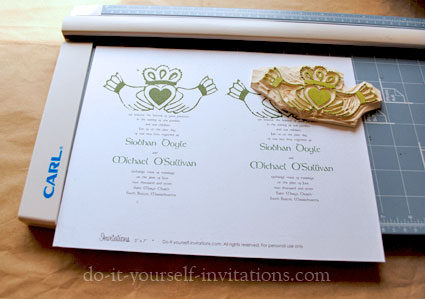 Next I used my paper cutter to trim the Irish wedding invitations from the template and a green cardstock bacing to match. I attached the two layers together with a adhesive glue runner. Viola!
More Irish Wedding Invitations Resources and Ideas...
Irish/Celtic Fonts Around The Net...
|
|
|||||
|
|
||||||
|
| Homepage | Shop | Wedding Invitations | Birthday Invitations | Baby Shower Invitations | Printable Invitations | Bridal Shower | Blog | Contact | Advertising Policy | Privacy Policy
By Chris Fleckenstein, Copyright © 2006-2013 Do-it-yourself-invitations.com |
||||||
