|
|
|||
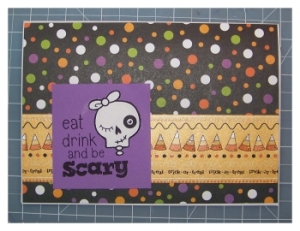
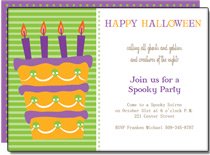
Make Your Own Halloween InvitationsThese Halloween invitations are fairly quick and easy to make. All you need is a little bit of decorative Halloween themed paper, some card stock or blank cards, and a Halloween themed rubber stamp or paper punch. Make cute keepsake invitations or just make it a fun project to get the kids involved in.
What you'll need to make Halloween invitations:
To get started you'll need something to use as the base of your invitation. I used a simple blank card for this project. Another option would be to use a piece of card stock and fold it in half. What I usually like to do (to save money on paper and have a nicer sized card) is to cut a regular 8 1/2" by 11" piece of card stock in half, and then fold each of these halves in half to make two small blank cards. This is also a good option if you want to have a more colorful card. It can also be a nice touch to print out one of my free printable invitation templates for printing the wording onto the inside of your invitations. Once you have the base of the card the rest is easy. I like to get all of my pieces together and then put it all together in a kind of assembly line. This is also a great choice if you have a bunch of people putting together the Halloween invitations together.
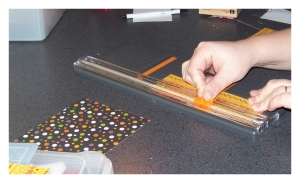 Pick a decorative paper to serve as the background of the invitation. You will need to cut the paper to the size of the front of the card. Use a paper cutter to cut a whole pile of this paper or you can even same time and hassle by bringing all of your papers to a local copy or print shop to be cut for you.
You will be cutting two more papers to size to create these Halloween invitations. Choose a second coordinating Halloween themed decorative paper to lay over the background of the front of the invitation. The length of this paper should be the same as the width of your card horizontally. Make it about 1 - 2 1/2" inches wide to create a long rectangular strip. Last you will need to cut a square piece of solid colored paper for embellishment. This is where you will place your rubber stamp or paper punch decoration. To decorate the square paper it is a good choice to go with a simple rubber stamp. Around the holidays you can probably find a goof themed
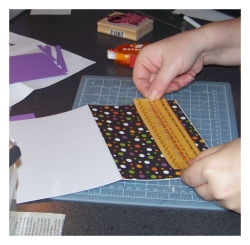 Assemble the Halloween invitations. Start by using a good adhesive like a permanent glue runner to adhere the papers to the card. The larger decorative background should be attached first. Next add the rectangular strip to the bottom half of the card, floating about an inch or so from the bottom.
Lastly just attach the little embellished squares of colored paper on top of the rectangular strip but a little of center. You could even use a bit of foam to attach them so that they kind of hover off of the invitation. This will give it an added element of decoration.
You may also like...
Do It Yourself Invitations Homepage > DIY Party Invitations > Easy Halloween Invitations
|
The DIYI Ezine
Stay up to date with the newest tutorials, free printables and giveaways!
Printable Templates
|
|||
|
|
||||
|
| Homepage | Shop | Wedding Invitations | Birthday Invitations | Baby Shower Invitations | Printable Invitations | Bridal Shower | Blog | Contact | Advertising Policy | Privacy Policy
By Chris Fleckenstein, Copyright © 2006-2013 Do-it-yourself-invitations.com |
||||
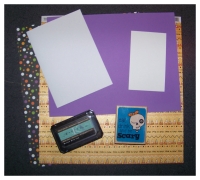
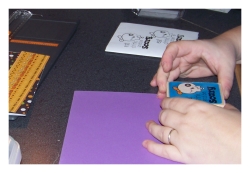 rubber stamp on sale very inexpensively. I bought the stamp I used for $2.00 in a clearance bin. Simply stamp the image centered to the middle of the paper. You can use colored or metallic inks if you wish. You could even use embossing ink and powder to make it stand out a bit. I chose to go with simple black ink. To dress it up a bit I stamped the image once onto the paper, and then again onto plain white paper. I then cut the skull image out from the white paper and glued it in place on the colored paper. I just like the little bit of emphasis it gave the decoration.