|
|
|||
|
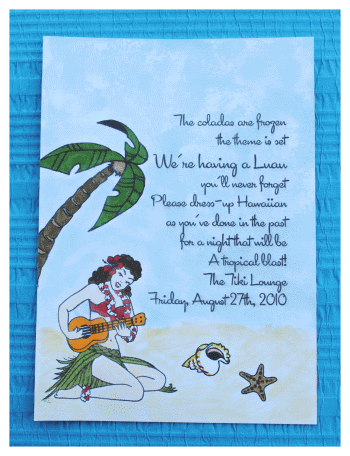
Luau InvitationsMake Your Own Luau Invitations Who doesn't love a good luau party or the great handmade invitations that come along with it? I came across this great rubber cling stamp from a little place online called Bomshell Stamps which features very fifties-ish and pin-up style vintage art. Very reminiscent of old sailor tattoos! I just could. Not. Resist. Pretty much every shop they have is fabulous but when I caught a glimpse of this great hula girl stamp my wheels started to turn and the result is what I came up with here on this page!
How To Make Luau Invitations
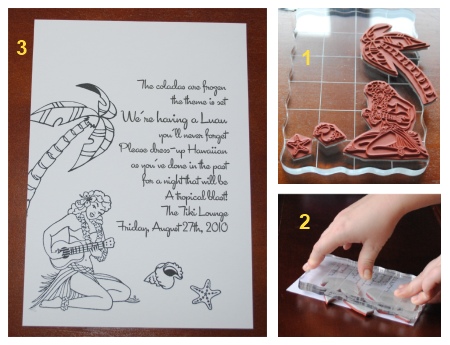
OK, so to get back on track, after print the wording for the invitations I used a paper cutter to trim them down to a 5" by 7" flat card. Since the stamps I purchased from Bombshell Stamps are cling stamps I got out my extra large acrylic stamping block, as well as some good, high quality black stamping ink. I laid my block on top of the invitation so I could get a clear idea of how much room I have to play with the stamped images around the type. I used several of the stamps arranged onto the block to create these luau invitations.

Once I had the stamps arranges how I liked them on the block I turned it over for a dry run just to make sure I could fit the images onto the card without covering any text. I then inked up my stamps and went to town!
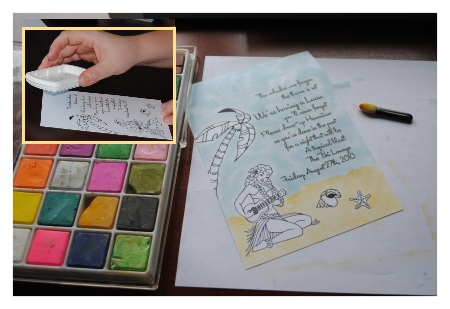
After stamping the image I decided to add some sky and sand. I knew I wanted to color the images in, but I couldn't bring myself to leave the background blank. So here's what I did. I used a chalk ink pad to blot the ink straight onto the card. The block is so big that IU could only get the larger areas at first. I had to make sure and use a very light hand, too, to give it that airy cloudy look. To fill in the smaller areas I used a make0-up sponge and dipped it into the chalk ink. I also used the make-up sponge to bland the ink on the page a little better.  For the sand I used some blending chalk. Blending chalk is pretty much just dry chalk that you apply with a brush or applicator. If you are short on cash you can pretty much just buy an appropriate colored piece of chalk, brake it in half, and use a Q-tip or eye shadow applicator to blend the chalk onto the page. I much prefer the chalk made expressly for this kind of project, I have to admit. It may cost more but it will be easier to use, and probably blend a lot easier. To finish the project up I got out some art markers I keep on hand and I simply colored everything in, aside for the hula girl's skin, in which I used the blending chalk. But if you have a flesh colored marker, go for it!
Go From Make Your Own Luau Invitations back to DIY Party Invitations Page
|
The DIYI Ezine
Stay up to date with the newest tutorials, free printables and giveaways!
|
|||
|
|
||||
|
| Homepage | Shop | Wedding Invitations | Birthday Invitations | Baby Shower Invitations | Printable Invitations | Bridal Shower | Blog | Contact | Advertising Policy | Privacy Policy
By Chris Fleckenstein, Copyright © 2006-2013 Do-it-yourself-invitations.com |
||||


