Make Your Own Duckie Birthday Invitations
Easy To Make Duckie Birthday Invitations With A Printable Template
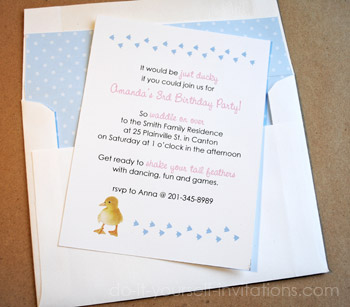 Planning a duck themed birthday party? I have a simple and easy solution to creating your own duck themed birthday invitations! And it's inexpensive to boot! Planning a duck themed birthday party? I have a simple and easy solution to creating your own duck themed birthday invitations! And it's inexpensive to boot!
What is sweeter than a baby duck theme? I have to admit that these invites were inspired by something dear to my heart.
We currently are raising eight baby chicks in a small brooding cage in our living room right now for our small backyard farm! The entire time I was awaiting the arrival of my baby chicks I was fawning and pining over baby ducks. Oh how I would love a few pet ducks of my own! Alas, there is just no room for them! Besides my husband may file for divorce if I try to add yet another animal to our little homestead farm! LOL!
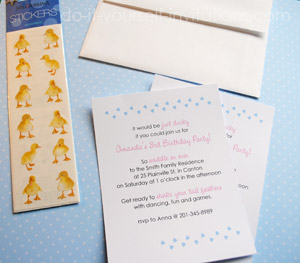 Materials and Supplies List:
- white cardstock
- paper cutter or trimmer
- duck stickers, stamps, or paper punch
- our printable invitation template
- decorative paper (optional - for envelope liner)
I happen to run across the cutest set of baby duckling stickers and I found them to be a perfect fit for these easy to make duckie birthday invitations. The beauty of this invite is that you can pretty much use any duck sticker, embellishment, or even paper punch shapes. A rubber stamp would work too!
How To Make DIY Duckling Invites:
1. Start by printing out our free interactive template.
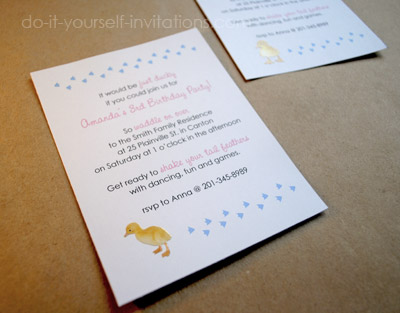 The template includes 4 different color options to work with, featuring ducky footprints in either pink, blue, yellow, or orange. To print just one color make sure and tell your printer which page to print by adjusting your printer settings.
To change the wording, fonts, and font colors and spacing, highlight the text you wish to change and press the CONTROL and "E" keys at the same time. This will bring a pop-up type tool menu.
I used the fonts Century Gothic and CAC Pinafore for the invites shown on this page. Both fonts can be found on the web with an easy internet search.
2. Cut the pages into quarters.
I used my simple home paper trimming tool to cut the pages at 4.25" and 5.5". Each sheet will create 4 invitations.
3. Add some duckling stickers, embellishments, stamps, or paper punch shapes.
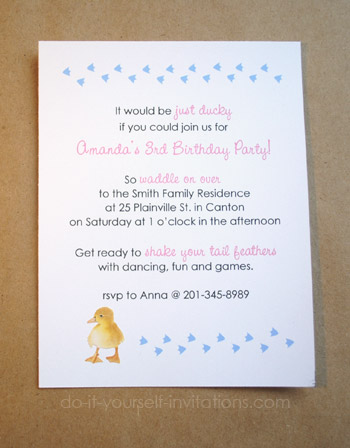 I chose to use these perfectly adorable stickers I scored at the craft store. But you have so many options for creating these ducky invitations. I chose to use these perfectly adorable stickers I scored at the craft store. But you have so many options for creating these ducky invitations.
Try using a rubber stamp to add a duck to your invites. You can even color it in with markers, chalk, or use some fuzzy flocking!
How about pre-made scrapbooking embellishments. For an extra fancy pants invite scrapbooking embellishments will work great!
Try your hand at paper punches! Find a duck themed paper punch and punch away! I think a nice patterned paper with a small print would look gorgeous!
4. Last and optional step - create matching envelope liners!
I created some cute coordinating envelope liners using some pretty polka dot patterned paper I had on hand. I simply trimmed the paper to size to fit the envelope. I tucked the lining in to where I wanted it to lay and added a strip of glue at the top, underneath the paper, just below the envelope glue.
This gives such a nice added personal touch, and a rich finished look to your DIY duckie birthday invitations.
But I Went A Step Further!!
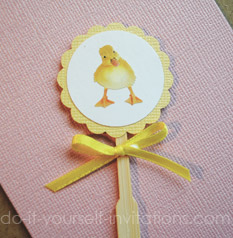 I had a bunch of stickers left over and I thought, "What better than to create matching decorations for the party??".
I started with homemade cupcake toppers I made by gluing together some paper I shaped with paper punches and placed one of the duckling stickers onto it. I them glued it to a party toothpick and tied on a petite bow.
You could also make table numbers, place cards, thank you tags, straw toppers, juice box labels, and more!
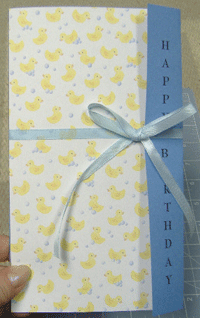
Homemade Ducky Birthday Invitations
These duckie birthday invitations are perfect for a baby's theme party or a first birthday party. Make the theme "rubber duckie" and your golden for a matching invitation!
These are pretty simple to create. Just pair some card stock with a little duckie themed decorative paper and some ribbon.
Materials needed to create these duckie birthday invitations:
- 8 1/2" by 11" card stock
- duckie themed decorative paper
- 8 1/2" by 11" plain white paper or vellum (optional)
- ribbon
- glue runner or other permanent adhesive
How to Make Duckie Birthday Invitations
Printing the wording onto this invitation can get a bit tricky, so I have provided a printable template to help make this card. You can download it by donating $1 to help keep this site up and running.
The template for making these duckie birthday invitations comes as two different sizes. You can make your invitations on the larger size by making each one out of a full size sheet of 8 1/2" by 11" card stock. I also provided a template for making smaller half sheet size invitations. This way you can conserve paper, not to mention it is a much easier size to find affordable envelopes to go with them.
Start by printing the template onto your chosen card stock. To make the invitations a bit more fancy try printing the text for the inside of the card onto either plain white cotton paper to layer to the inside, or even print onto a translucent or frosted vellum.
Next you will cut the decorative duck themed paper down to size. For a larger invitation cut the paper to measure 8 1/2" by 10". For the smaller invites cut the paper to 7 3/4" by 5 1/2".
Now comes the trickier part - folding these invitations. It may be easiest to fold these if you score them first. Many sliding blade paper cutters have a scoring attachment.
For the larger invite score the paper at 1" from the edge where the "Happy Birthday" text is printed and then measure the halfway point between the score mark and the opposite edge. For the smaller invitation score them 3/4" of an inch form the edge, and then measure the halfway point between the edges to fold.
Now to attach the decorative paper. Start by applying a strip of adhesive to the outer edge of teh decorative paper, using your glue runner. Attach this edge of the paper to the cardstock, at the fold just after the "Happy Birthday" wording. apply another strip of glue to the cardstock along the opposite edge and then smooth the decorative paper over and into place. Fold it around the edge to the front of the card. Apply two more strips of glue and attach the paper to the front.
To attach the ribbon to the card first lay the ribbon onto some scrap paper. About 7 - 10 inches down from the edge of the ribbon apply a small amount of adhesive from your glue runner. Attach the ribbon to the back of the card, meeting the back edge of the card with the part of the ribbon which you applied the glue. Wrap the ribbon around the card and apply another small strip of glue to attach it to the front. Make sure and apply the glue to a spot before the fold of the flap on the front of the card. Tie the ribbon in place so the bow meets on the front of the card, not to the side.
That's it! Now you've got really cute duckie birthday invitations that will really make a great first impression for your party!
|

 Materials and Supplies List:
 I had a bunch of stickers left over and I thought, "What better than to create matching decorations for the party??".
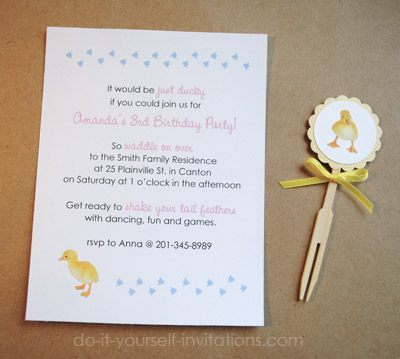
 Planning a duck themed birthday party? I have a simple and easy solution to creating your own duck themed birthday invitations! And it's inexpensive to boot!
 The template includes 4 different color options to work with, featuring ducky footprints in either pink, blue, yellow, or orange. To print just one color make sure and tell your printer which page to print by adjusting your printer settings.
 I chose to use these perfectly adorable stickers I scored at the craft store. But you have so many options for creating these ducky invitations.
